Praise the Lord!
(May 2019)
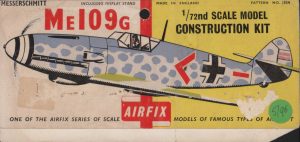
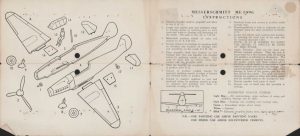
I don’t know about other scale modellers, but the first few models I made, Airfix, Frog and Revell, went unpainted. It was enough for me to have the bare plastic with the simple decals the kit provided stuck on them. Then I took to reading the kit instructions more carefully and found the painting instructions too. Those first colour instructions were quite simple and left a lot to the imagination of this young modeller.


The local hardware shop sold small tins of paint for less than a shilling, shiny enamel stuff that took the best part of a day to dry. Over a year of so I built up a small collection of them; a green, a blue and a brown, and black and white to make all shades of grey. The color instructions in the kits were not very specific and I wasn’t either. If the kit instructions said to use green, blue and grey, I had everything I needed.
At some stage I discovered scale modelling magazines, in particular Airfix Magazine, which started to open my eyes to the varieties of aircraft colours. I also read about this thing called Humbrol paint, but it was not until I was in Melbourne one time and went to Melbourne Sports Depot where I saw the Humbrol tinlets for the first time. They were might attractive and I was keen to get some, but at two shillings a tinlet, I couldn’t afford them, and had to continue using my existing supply of house paint.
A few years later I was living in Melbourne and earning enough to be able to buy some of these Humbrol paints. As I recall, Airfix and Heller had their own line of paint, and Revell still does, but Humbrol had started producing paint in ‘camouflage’ colours, coinciding with a growing awareness of the complexities of painting aeroplanes in accurate colours. The advent of the American magazines like Scale Modeler with their full colour interior pages also emphasized the somewhat novel fact that the Germans and British did not use the same hues of green and grey on their aeroplanes during the Battle of Britain.
Humbrol paint was designed to be brush painted and that’s what most modellers did. However, I began reading about these things called ‘airbrushes’ and they started appearing in the model shops like Hearns Hobbies and Model Dockyard. Still, they were very expensive and it was not until a friend and I got royalties for a play we’d sold that I could afford one. It did not take me long to learn that I needed a compressor too, which was almost as expensive as the airbrush had been.
Thus began the long relationship that I’ve had with Humbrol paints sprayed through an airbrush. The only innovation to this was the discovery, probably in the 1980s but I could not be sure, of the range of American Modelmaster enamels in their little glass bottles which seemed to have an even greater range of ‘authentic’ colours than Humbrol. One of the great advantages of Modelmaster paints were that they came in screw top bottles and were therefore easier to use and keep sealed than the Humbrol tinlets. So, over the following years and decades I built up quite a collection of Humbrol and Modelmaster paints, supplemented by Metalizer and later Alclad II metallic paints.
Life went on happily for a long time until, only a year or two ago, I discovered that Modelmaster enamels were no longer available in Australia. I didn’t read anything or hear anything, they just stopped being available in shops and on Australian websites. This would not have been a problem except that, being enamels, it became impossible to import them from shops overseas. At the same time, the quality of Humbrol paint had declined dramatically so that suddenly I found the enamel paints I was so used to using were no longer available or useable.
Talking to some members of the local scale modelling club it emerged that they were using these new, to me, acrylic paints. The models they were putting on the table at the monthly meetings looked pretty good to me so, on one of our trips down to the model shops of Melbourne, I bought a few sets of these paints. Some of them were okay and some of them were so thin that they came out of my airbrush as though they were coloured water – which is what they were in reality. This led me to invest in new airbrushes to cope with this new watery paint and I now have three Badger airbrushes, each one with a smaller needle than the one before to try to control the problem of this runny paint that ran everywhere. I also experimented with various brands of acrylic paint and found some that suited me better than others.
The other problem I had with these new acrylic paints was that most of them were so thin that it was possible to brush paint them to touch up any blemishes. I still had my enamels to do that, but of course most paint makers have slightly different ideas of what RLM 02, for example, actually looks like, so using them on acrylic paints was fraught with unhappiness. There was also the increasing probability that mixing enamel and acrylic paint with Gloscote and Dulcote top coats, which are lacquers, would end up in one of those crinkly finishes that bedevil so much model making in the final stages of construction.
As a result of all this, I was not enjoying my model making. I could complete the perfect model but I felt no sense of safety as I approached my paint booth. How would the acrylics go this time, how would the touch up go and what would be the chemical reaction from a mix of different kinds of paints? After one particularly disappointing visit to the my paint booth where the yellow paint ran everywhere and puddled, creating a dreadful result, I threw all my acrylic paint into the bin lest I be tempted to use it again.
Fortunately for me, lacquer paints had began appearing in camouflage colours. I already knew about lacquers from my discovery of them as the solution to the big problem of using enamel paint on airliners. White had become the predominant colour of airliners but white enamels do not give an ideal airliner quality finish and, to make matters worse, they go yellow over time. The solution that was suggested to me was Tamiya Pure White lacquer which was available in rattle cans. It took me a while to get used to this new paint and I finally solved the problem of the paint going everywhere out of the rattle can by finding out how to decant the paint into a bottle and then spray it through one of my airbrushes, the Badger Patriot being ideal for the job.
I also had some experience with camouflage lacquers with the MRP and SBS ranges. They did not please me, however, being as thin as acrylic paints and therefore having one of the problems that had annoyed me so much with acrylics. However, at around the time that I threw out all my acrylic paint AK Interactive ‘Real Color’ lacquer paint started becoming available in Australia. To start with I bought one of their sets for US Navy aircraft and, at the same time, I saw that Hataka had released a set of French camouflage lacquer paints, probably the same colours as their French camouflage acrylic range that I’d bought, tried and thrown in the bin. Thus armed I set out on a new adventure.
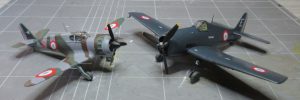
First off was the RS Models Bloch 151, a little fighter of dubious quality during the Battle of France but a nice little kit. As an experiment I primed it in MRP black primer. Using black primer seems to be all the rage these days so I thought I’d give it a go. While I feared that the Hataka lacquers would be too thin this proved not to be the case. Straight from the dropper bottle into the paint cup of my Badger Xtreme Patriot the paint went on exceptionally smoothly and gave good coverage over the black primer with the first coat, and excellent coverage with two coats. Even the light blue underside sprayed over black primer required only two coats, and the second one was really only for insurance.
Next came the big test, how would the Hataka lacquer paint go with hand painting. The upper colours of green and brown on this model could not be airbrushed (not with my limited skills anyhow) so I had to hand paint them instead. I’d found that hand brushing acrylics over an earlier painted surface often led to tears so I was apprehensive with the lacquers, but I experienced no problems at all. Not only that, the finish of these lacquer paints was smooth and glossy so there was no need to apply a gloss top coat before applying the decals. After that, all I needed was a single overcoat of Tamiya matt varnish, and the end result was a nice looking little model. Having been emboldened I moved on to make the RS Models Bloch 152, which is quite similar to the 151. The results were the same and I was converted to these new paints.
The other test I needed to run was of the AK Interactive ‘Real Color’ lacquers. They come in little glass bottles quite like Tamiya paints and are, when you open the bottle and give them a stir, quite thick in comparison to almost all other paints I’ve bought in the past decade. I had the Eduard F6F-5 that I wanted to use in the standard late was USN Deep Sea Blue scheme. AK call it Dark Sea Blue and, to my eye, it is a little too grey, but AK say that theirs is the most accurate range of colours ever produced, and I’m willing to trust them, a little. For the first time in a long time, I had to thin this paint to go through my airbrush, about 2/3 paint and 1/3 thinner seemed just about right for my Badger Patriot and I applied the second coat just to make sure that I had got complete coverage with the first coat. Again, the finish was perfectly smooth and lightly gloss, so there was no need for a gloss coat for decaling.
What sold me on these paints was that all the touching up was done with an ordinary paint brush and that many of the little details; oleos, guns, propeller blades and tips and wheels, were all hand painted successfully using AK lacquers.
I’m converted and I’m now looking at websites to see what other AK and Hataka lacquers I can buy to return the painting pleasure to my modeling.

Leigh Edmonds