The Interesting Modelling Company made me make this. There I was with not a care in the world (well, no more than usual) taking in the latest you tube of the Interesting Modelling Company while working away on one of those A.330 models that I’m going to finish one of these days, but feeling a tad uninterested in it. Their chatter was amiable and informed, as always, and a good distraction from masking the corogard panels, but I pricked up my ears when Jonathan announced, that they were declaring August to be ‘Airfix August’. We were instructed to get an Airfix kit and make it. We could make whatever we liked but there was a hint that one of the Airfix ‘Classic’ kits would be good. ‘Hmm…’ I thought.
The deHavilland Comet airliner came instantly to mind. As I recall, their kit of the Comet 4B was one of their first 1/144 ‘Skyking’ airliner kits which I must have made back in the 1960s. You could still see them at swap and sells and I recalled picking up one or two there that I put into my Treasure for a rainy day. Why not make one of them? Why not! If I started right away it shouldn’t be too difficult and I’d be finished well ahead of the end of Airfix August.
Consulting the data base of my Treasure I found that I had collected three Airfix Comets over the years, and an Amodel one too. I debated the idea of making it ‘Amodel August’ too, but took possession of my sanity before that went too far.
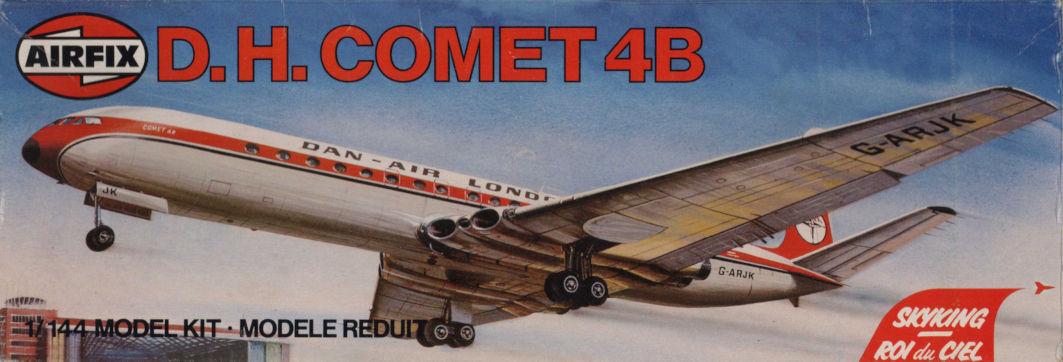
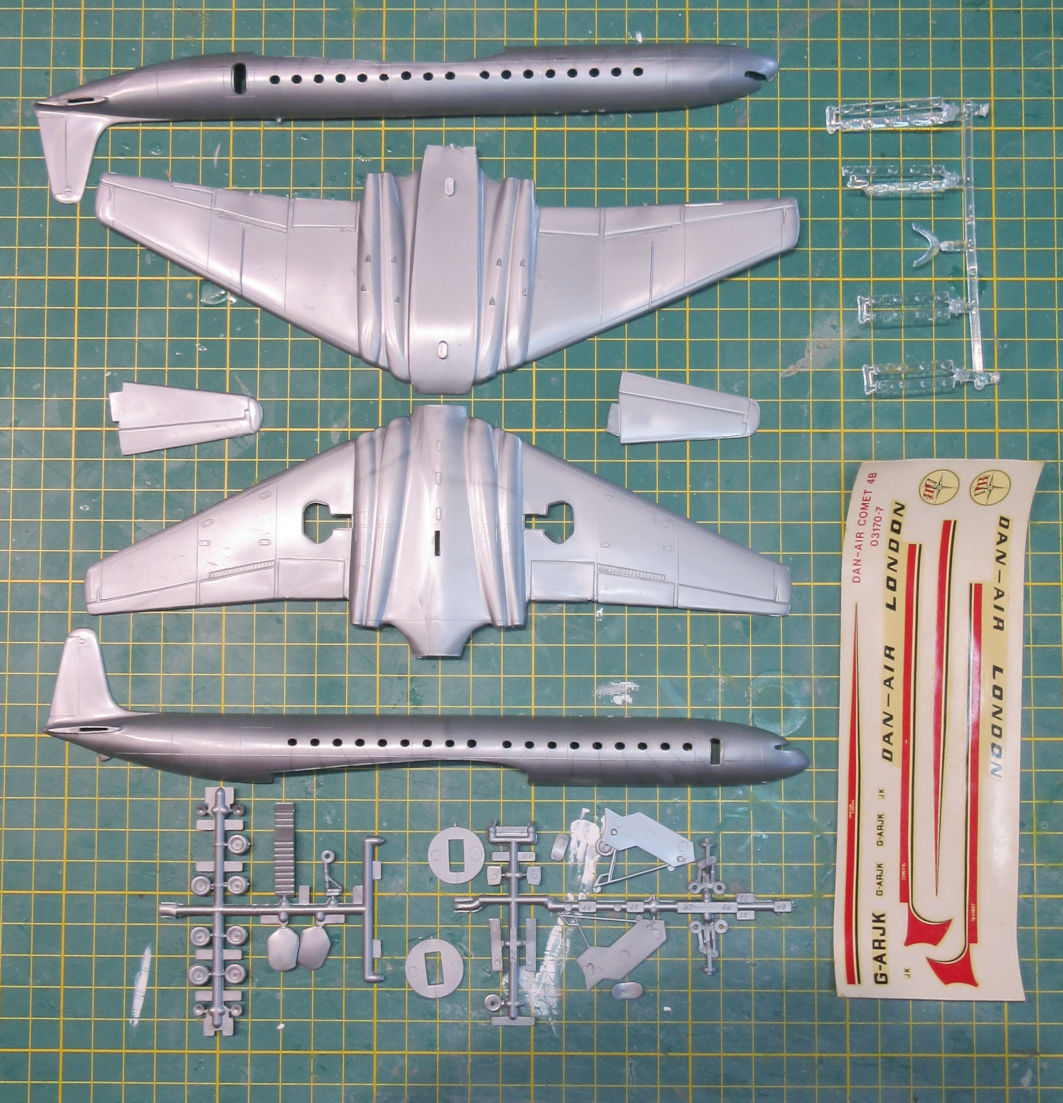
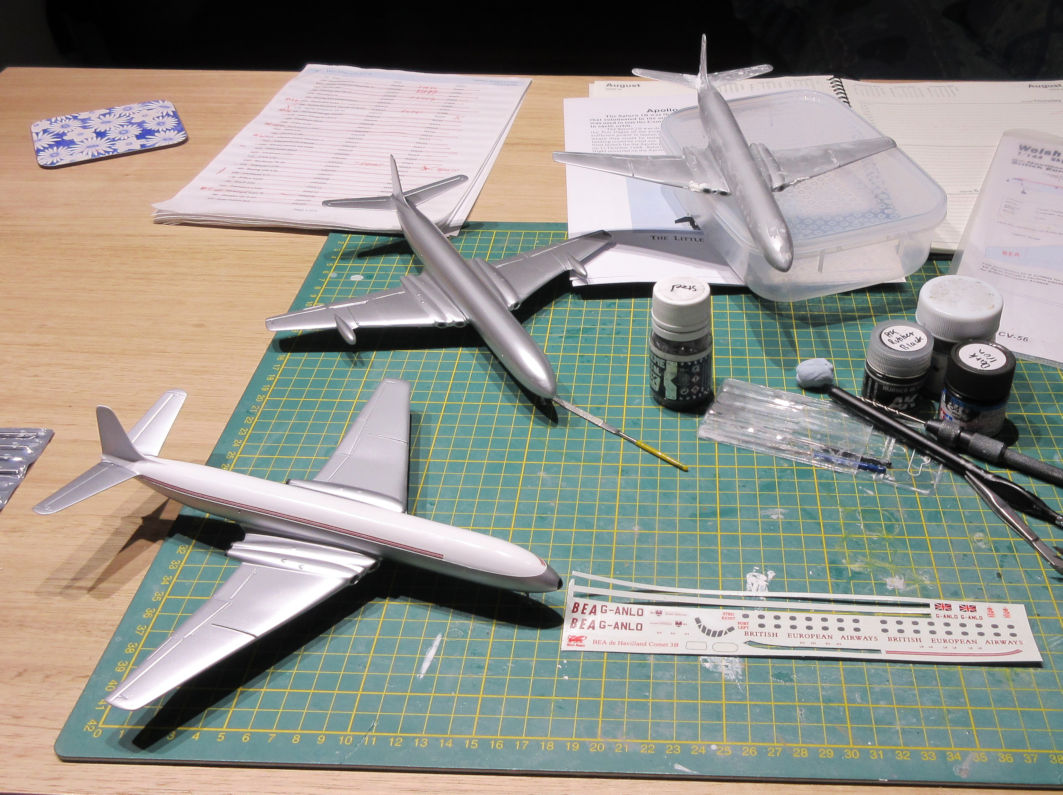
What else did I have in my Treasure? There was a Mando Models conversion kit for a Comet 3B/4B of the RAF Blind Landing Experimental Unit with resin parts, a Welsh Models conversion kit for a BEA Comet 3B with a vacform fuselage and a nice looking decal sheet, and some decals for a BEA Comet 4B. My data base tells me that I also have a Microscale decal sheet that includes decals for an Olympic Airways Comet 4, but I can’t find it anywhere. Finally, there was a conversion kit with new wings to make a Comet 4C with the wing tanks that I recall buying in the Perth Hobby Center, say about 25 to 30 years ago. All three kits came with Dan-Air decals which seem quite undignified for such an elegant looking airliner.
With these raw materials at hand a bold plan emerged to make three models with the three Airfix kits, a Comet 3B, a Comet 4B and a Comet 4C. The Comet 4B could be made right out of the box and the other two would not require much work. The Comet 3B was a bit shorter, which is what the vacformed fuselages in the Welsh Models kit was for. However, I reckoned it would be easier and simpler to just take a slice out of the kit fuselage so as to avoid all the trauma of trying to make the vacformed fuselage fit onto the Airfix wings. The Mando Models conversion instructions shows how much to amputate, so that was made easy.
At this point I realized that I had two conversion kits for a Comet 3 and learned from the www that only one Comet 3 was ever built. Which one to make? The Blind Landing Experimental Unit one would have been more interesting and colourful but there are only 31 days in August and I thought that version might have taken a little longer. Besides, I can save it up for the Amodel kit, one of these days. On the other hand, it seems that the BEA Comet 3B never flew a revenue service but was painted in this scheme for the 1954 Farnborough air show. Never mind, it will look beautiful.
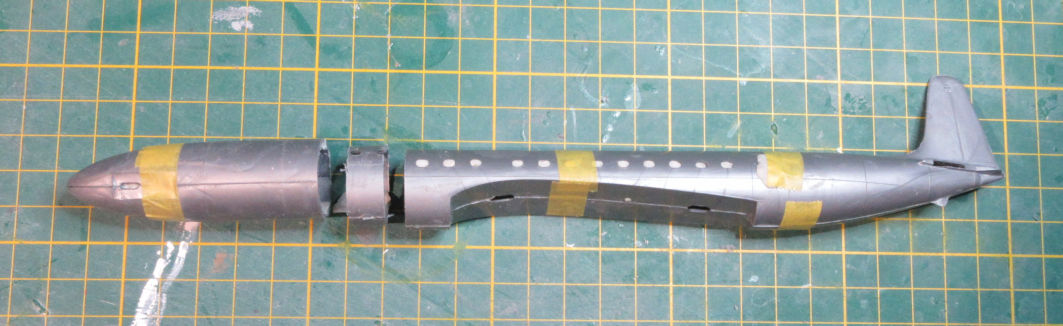
This kit was first released by Airfix in 1961, which makes it over sixty years old. The kits I had were published in 1994 and 1996 so even they are now getting very old, for a plastic model kit. However, they are still fairly serviceable for airliner kits in this scale and go together relatively easily. Apart from one aspect, they stand up well against more modern kits, but that aspect is very important. The kit engine intakes look truly dreadful, just holes moulded on the leading edges of the wings, and rather blunt looking with nothing behind them. My first thought was simply to fill the holes with an epoxy putty and then drill them out, but the results looked only a little better and were uneven.
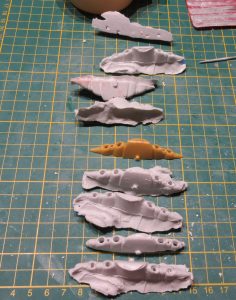
Fortunately the Mando Models conversion kit had the solution with a resin moulding for the engine intakes which looked much better. It is a very long time since I’ve tried moulding my own parts but I have that stuff that turns soft if you dunk it in boiling hot water with which to make a mould, so I taught myself how to do that again and used the Mando engine intakes as the master for the process. I got the hang of it after two or three goes, and it took me ten or so attempts to make copies using two party epoxy resin before I had three copies that looked presentable. Then there was the business of merging them with the rest of the model. It took only a few lines to say that but well over a week of experimenting and testing to make it happen.
The kit engine exhausts are also dreadful and had to be replaced with some plastic tubing, but that only took an evening.
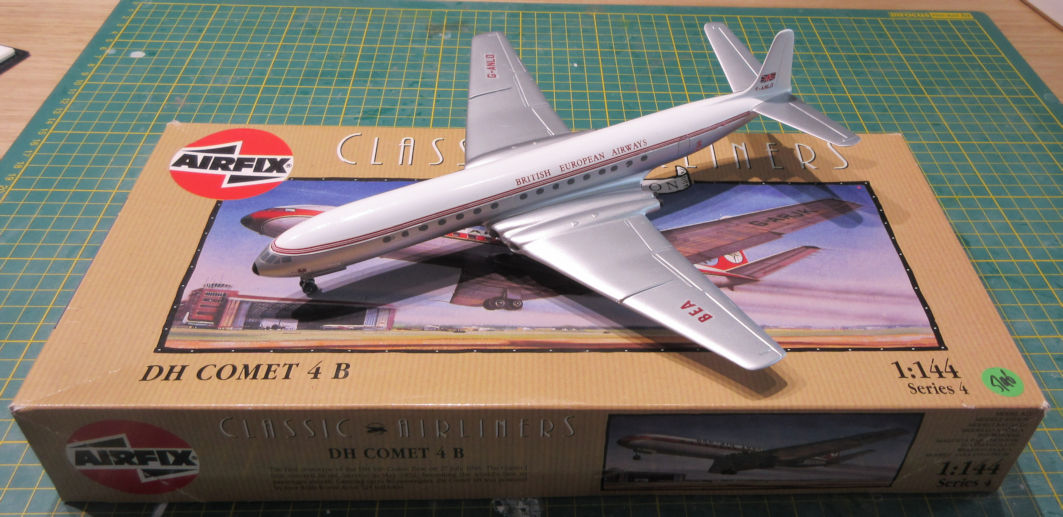
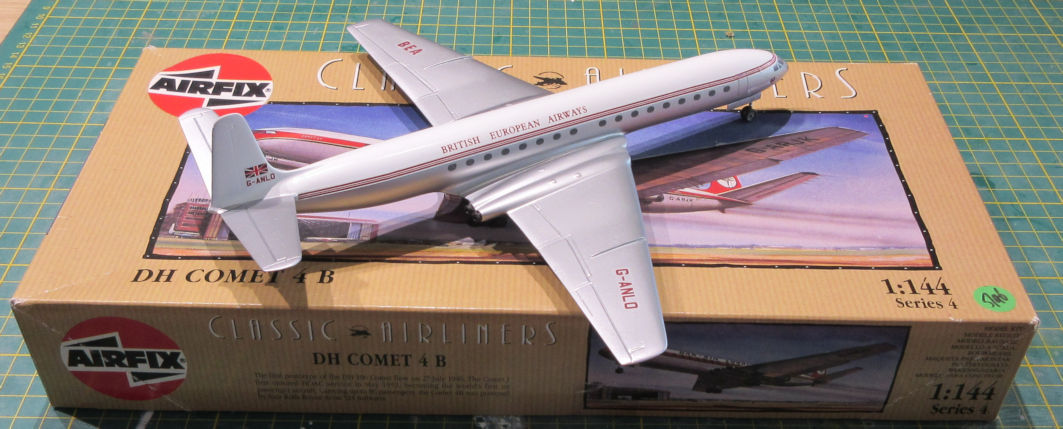
By the time I’d got the new engine intakes fixed on all three Airfix kits the days remaining in Airfix August had dwindled down to a precious few, so I decided to give priority to only one to get at least one done by the end of the month. The BEA Comet 4B will be the one with the beautiful red wings, but would take more masking and painting, and the decals for the 4C have yet to arrive, so the BEA Comet 3B would have to be it.
The process went smoothly although it took about four goes to get a perfectly smooth surface around the areas where the new intakes were merged into the rest of the model. Then it was a couple of coats of SMS Metallic Aluminium, which looks very nice, and the upper surface of the fuselage painted in various whites, culminating with a couple of coats of Tamiya rattle can Pure White. There were a couple of little masking accidents that had to be fixed, and then it was time for the decals.
For me, placing decals on a model is one of the happiest parts of the modelling process because that’s when the lump of plastic I’ve been working on starts to become a model. On this occasion, however, it was the cause of great stress because these Welsh Models decals have to be among the most brittle I’ve every used. Before applying decals, particularly for airliners, I give them a coat of Aqua Gloss Clear, partly in the hope of preventing decals from disintegrating and also because it then gives the decals the same gloss texture as Tamiya Pure White lacquer. It turned out that one coat of Aqua Gloss was not enough and the first decal I tried to apply broke up as soon as I tried to move it. Fortunately I was able to reassemble it, accompanied by the foulest of oaths and curses for the modelling god responsible for decals. It was necessary, however, because there is no other scheme option for this particular aircraft so there was no fallback option.
All I could do was apply a second thick coat of Aqua Gloss, be as patient as possible and try to move the decals as little as possible. Unfortunately more than one coat of Aqua Gloss makes the decals want to curl up from the model’s surface so buckets of Micro Sol were needed to soften them and then diluted Aquadhere to try to hold the soften decals down. It was a very trying business strung out over three or four days, leaving decals to set completely before moving on to apply a few more. And when dry, the decals were very brittle so I had to use a lot of care not to damage the ones that had already be placed on the model. Even so, there are a couple of blemishes that resulted about which I can do nothing.
After all that trial and trouble the completed little Comet 3B in its unusual BEA livery looks almost as pretty as I hoped it would be, if you don’t look too closely.
PS. A little historical note for those who don’t know about the Comet. It was the world’s first commercial jet airliner and the Comet 1 entered service in May 1952. However there were several disaster’s within the first year which, investigations showed, were due to cracks developing in the airframe as the fuselage expanded and contracted while climbing and descending to operational altitudes. As a result the Comet was grounded and it took several years before the problem was resolved and more advanced Comets, the Comet 2 and Comet 4, took to the skies. By then it was too late because Boeing 707s and Douglas DC-8s had entered service and outclassed the Comet, so only 114 of them were built.
Here is a photo of the Airfix Comet 3B alongside a F-Rsin Comet 1. Note the square windows on the Comet 1 and the oval windows on the Comet 3. There is a reason for this.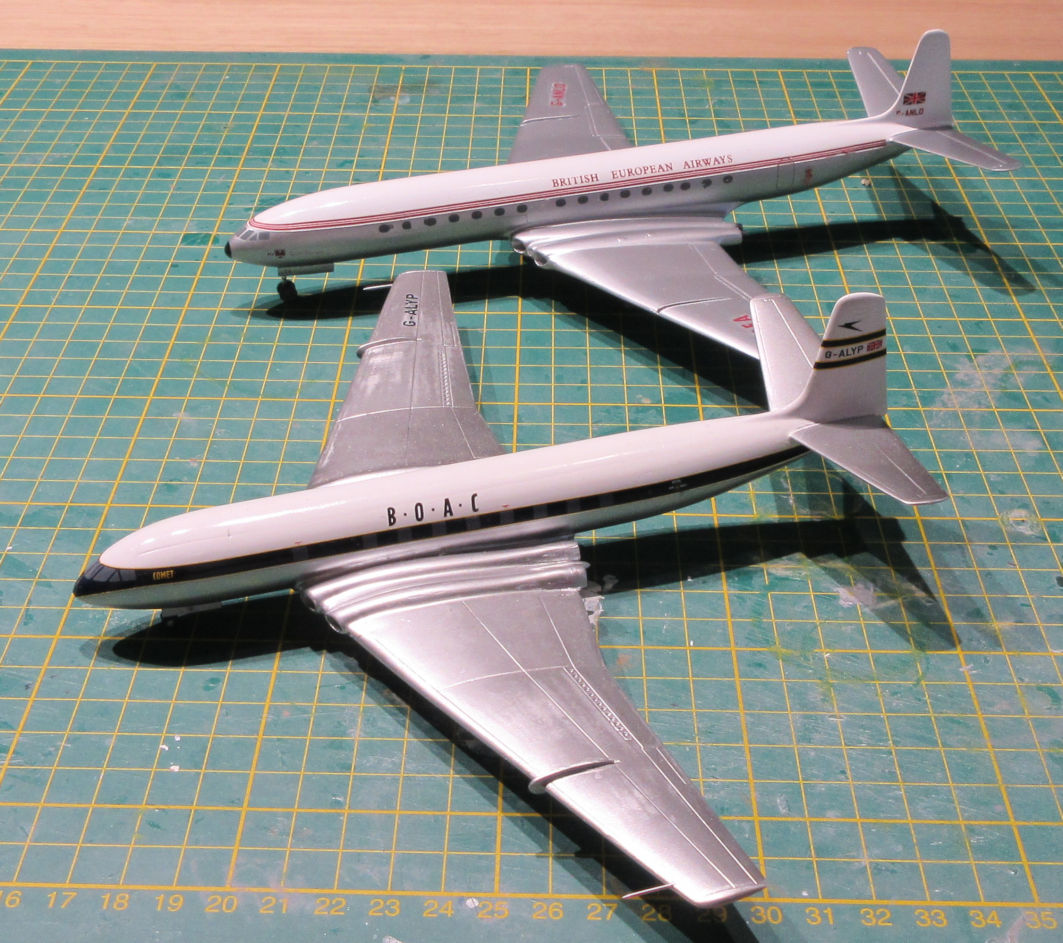
Leigh Edmonds
September 2022
 Airfix 144 The Little Aviation Museum")