Perhaps I should ask people to find a name for the kind of animal the C-124 reminds them of. To me it looks, well, like a big fat hippopotamus (how do you spell that again?) wearing one of those plastic charity red noses. Which might be the reason why I’ve had the desire to make a model of one for a long time.
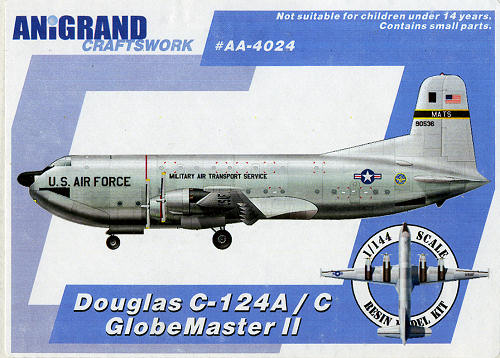
There are, so far as I am aware, three kits of this aeroplane. Anigrand do resin kits in 1/72 and 1/144 and Welsh Models do one in 1/144. Since this was such a big aeroplane I decided not to try making one in the larger scale – I can hear the sounds of disappointment from here. The Welsh Models kit is a vacform thing, which is not a bad thing in itself if you don’t mind leaving your fingertips on the sand paper, but vacformed plastic and nice round radial engines are one of the more challenging aspects of making Welsh Model kits, but not something that I care to repeat for my sanity’s sake. So that left me with the Anigrand option.

The first thing to know about Anigrand kits is that they leave a rather large vacuum in your bank account. This can be alleviated to some extend because the kit on the box lid comes with another three smaller kits, which are of dubious accuracy and value if you ask me. But I was rather astounded to discover that if you bundle them up in individual little plastic bags, write $15 on them and offer them for sale at swap-and-sells there are people who are glad to relieve you of them. This almost brings them within the price range of your average big 1/144 airliner kits these days.
The second thing to know about Anigrand kits is that, unlike some of the slick resin kits you get from the Czech Republic and similar localities, these kits are not a whole bundle of laughs in the ease of construction stakes. You have to treat them as the basic shapes necessary to make up the advertised model, you need more than a scalpel and some superglue to stick these kits together. The things that help you get by include some good photos of what you are making from the internet as a guide because the instruction sheet is more indicative than instructive, a tube or so of filler, the patience of Job, the wisdom of Solomon (see my comments on instruction sheets) and a florid and anatomically imaginative vocabulary to help you through the rough patches.
The third thing you need to know about Anigrand kits is … oh, never mind!
One of the things that drives me nuts about the kit reviews you read on the interweb is the interminable descriptions of how all the bits were glued together, written as though the kinds of people who find their way to such interweb sites are ignorant of all that detail. So let me spare you the stories of gluing this bit to that bit and then finding that the superglue has run down the side of the pieces and firmly attached the resin to my fingers. (You never read about that kind of thing happening in the reviews but I don’t suppose it means that’s the kind of thing that only happens to me.) So, let’s go straight to the most interesting bits of the process of making a silk purse out of this particular sow’s ear.
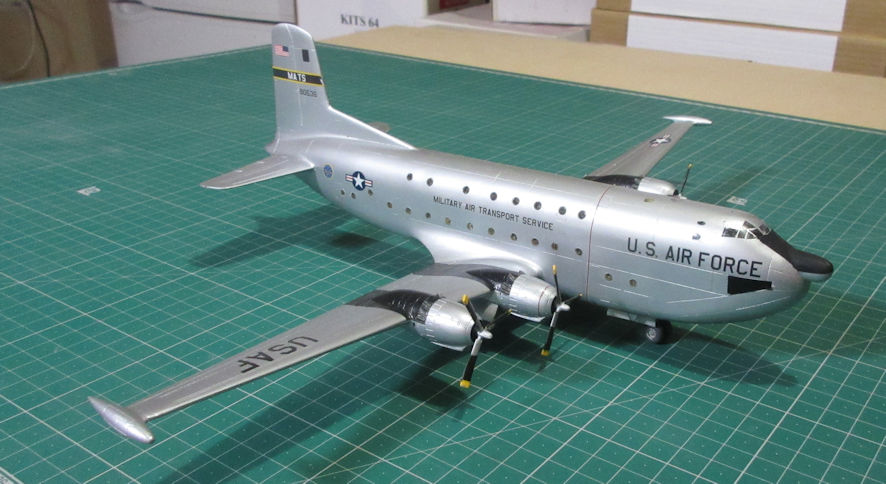
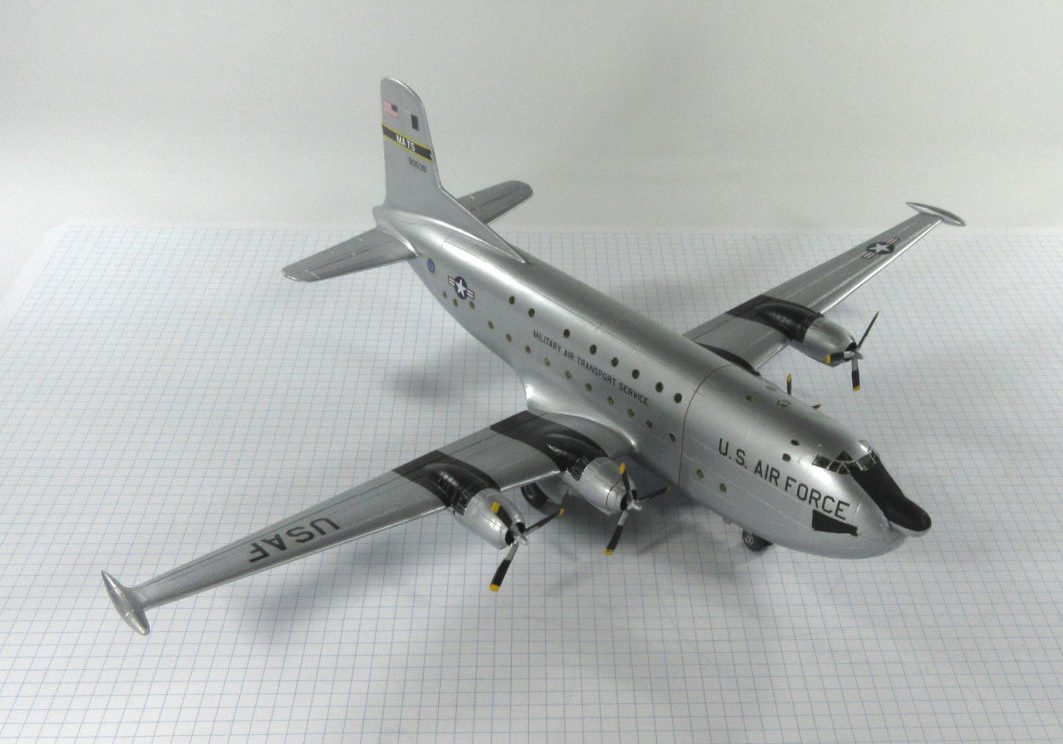
This kit comes with optional parts and decals to make either the A or the C version. The main difference between them is that the A has a blunt nose and four blade propellers and lacks the nice little pods on the ends of the wings. I chose to make the C version because I like the nice little radar bump on the nose and because it only has three blade propellers – see below.
Anigrand like to cram a large mass of resin bits into a small box so the fuselage comes in four parts. Oddly enough, these four large parts don’t fit together too accurately without the selective dowsing of parts in boiling hot water to bring them to the right shape, vigorous sanding and filing to get the pieces to line up squarely and then (always the most exciting part of the process) gluing these four pieces together with superglue which either decides not to set at all or, sets instantly before you’re sure all the bits are lined up properly and you squirt the lot with accelerator. (As an aside, this was the stage at which some of the glue attached itself to my finger and I discovered that superglue gets rather hot rather quickly when hit with accelerator. This was also one of the times when the florid vocabulary proved useful.)
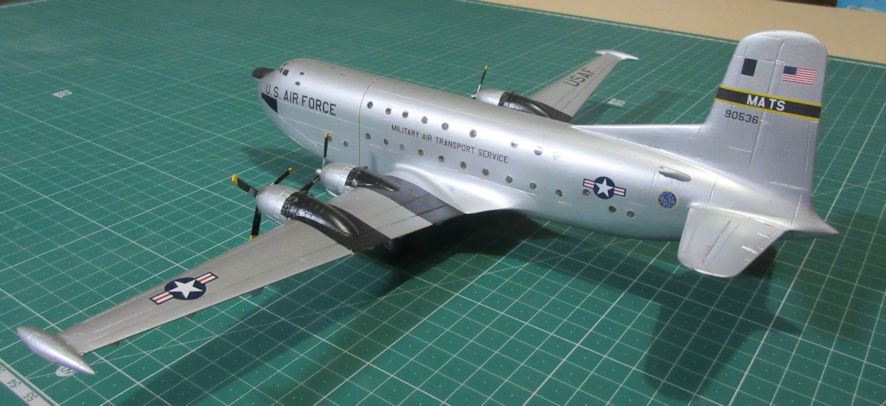
Recalling that moment of pain reminds me that I’ve skipped over one of the most interesting aspects of this construction process. It won’t have escaped your attention that the C-124 has lots of port holes along the sides of its fuselage. The kit provides you with the holes and rather chunky lumps of clear resin to fill them. However, it is disappointing to discover, after you have liberated the round resin bits from the large hunk of resin to which they are moulded, that the thickness of the resin fuselage parts and the length of the round clear resin bits are not the same with the result that, if you were to use them, there would be a gap of a 1/16th of an inch or so between the surface of the windows and the surrounding fuselage. To overcome this I thought I’d try using superglue to fill the holes instead because I had previously discovered that set superglue polished up rather nice and clearly. So, the plan was the fill each of the holes with a nice dollop of thick superglue, squirt it with accelerator and see what happened. It’s not a bad plan, really, marred only by the bubbles that you find in the superglue after it is set and while you are sanding it back and polishing it. It turned out that I needed about three tries to get each of the portholes looking okay. When bubbles were discovered I finally found a use for those dental probes that I bought all those years ago in enlarging and filling the holes. In fact, I attacked the larger holes with a drill to make sure the holes had nice smooth sides that would not mar the final polish on the windows. With all this manipulation of and tiny holes going on I felt rather as a dentist must feel in his or her daily work. Now I’m sure that’s a job I wouldn’t like.
After that it was just a matter of masking all these holes, but that was easily solved using a leather hole punch and some masking tape (but writing that does not adequately cover the problems in getting the punch to work properly or the process of getting the little round bits of masking tape from the inside of the punch to the surface of the model. More florid language.)
Having more or less solved the problem of the fuselage we move to the wings which, to put it bluntly, were not in very airworthy shape as they came from the box. Still, it wasn’t anything that more sloshing about of scalding hot water couldn’t put more or less to rights. (As an aside made a month or two after completing the model, I note that one of the wings has reverted to something like its shape previous to being attacked with hot water and I would not get into an aeroplane that looked like this in real life. But let’s not dwell on such minor problems.)
It would not be fair to say, I think, that the joint between the wings and fuselage were square and without significant gaps. Here again, the situation was saved by large dollops of superglue and accelerator.
The final major difficulty lay in the propellers. These days most 1/144 kits come with the propellers – blades and hubs – in one piece, but not this kit. This results in a challenge in handling tiny bits of resin that are smaller than your fingers with the inevitable result that more glue ends up on your fingers so, often enough, the tiny blades and the even tinier hubs end up sticking, not to each other, but to you. This phase of the operation is not something that I care to reflect upon without the presence of a trained therapist.
After some time and effort you finally end up with a basic shape that comes close to representing what a real C-124 might look like. The next thing is to paint and finish it appropriately so as to be pleasing to the eye. For various reasons the undercarriage legs were attached at this stage and the model liberally sprayed with primer and sanded back two or three times to ensure the finish is smooth enough to represent a bare metal aeroplane. The filling and sanding process occupies several evenings, each one completed in the kitchen sink to wash the model clean again before repeating the process. And, ‘Ooh .. What’s that I see disappearing down the plug hole?’ It’s the nose undercarriage leg …Well, that’s what the spared box is for.
Having achieved a finish something close to perfection, you don’t need to aim for absolute perfection for the same reasons that arabs include deliberate mistakes in carpets and the like – though I’m sure that Mark would not agree with this philosophy (some might say excuse). I have become rather a fan of the Tamiya rattle cans that Steve has been using for more or less metallic finishes, mainly because they set nice and quickly and offer a variety of shades. For the C-124 I experimented with TS-76 Mica Silver which turned out to be a bit glittery, so I gave the model a good rub over with some very fine Micromesh cloth to dull it a little, and it looks pretty good. I will try another can next time and see how it comes out.
Finally, on with the decals. This is a bit of an intellectual challenge because of the way Anigrand makes it decal sheets. Rather than giving you sheets which, for example, repeat the serial number to go on each side of the tail fin, they only give you one number on a sheet but give you two sheets. This is probably for sake of economy because it would be cheaper to print a larger number of a small sheet than it would be to print less of a larger sheet. And to save more money, they print the markings for all four kits on the same sheet and, I can only surmise, the markings for other kit sets as well because there are always a large number of decals left over. Consequently, you have to peer carefully at the instruction sheet and check with photos to make sure the right decals go in the right places. As I was trying to find out which serial numbers from the decal sheets went on this model I ended up Googling the number that the instruction sheet suggested and found that it did not belong on a C-124, it belonged on a C-133. This can either mean that Anigrand have a C-133 in the works or they just got it wrong. But I stuck the numbers on anyhow because, frankly, by this stage I just didn’t care any more.
Now, is there anything else you need to know before you make your own Anigrand C-124?


Leigh Edmonds
August 2011
