This model came out of two things I wanted to do this year. One was to participate in the Model Geeks Podcast group build, this time on the theme of ‘MiG Killers’. The other thing was to write this monthly contribution only about Australian aircraft. (This means either an aircraft registered in the RAAF’s A- series or having the civil VH- registration. Yes, I know that the Navy has a separate registration system, as do ultra light and sports aircraft, but now you’re just trying to confuse me.)
Looking around for an Australian aircraft that has shot down a MiG is a fairly barren landscape. I’m unaware of any RAAF MiG kills after the Korean war, either because Australian aircraft in later conflicts were not in the air-superiority business or because the Americans were keeping all the MiG killing opportunities for themselves. I did wonder if any Australians were involved in shooting down MiGs while on secondment to the US military but that would have been done in aircraft with US markings, and that would defeat the whole purpose of the exercise.
Even the first war in which Australians might have encountered MiGs is fairly unfruitful because Australians were flying Mustangs and Meteors, which were not what one might say were in the MiG killing class. However, after digging around a bit, I fond there were a couple of occasions when hapless MiG drivers happened to fly in front of the guns of Meteors. One occasion was on 27 March 1953 when some 77 Squadron Meteors were out straffing enemy ground positions when they were engaged by MiGs. One MiG, trying to get behind Sergeant Hale’s Meteor, overshot and Hale got some cannon shots into it behind the cockpit, it rolled over and fell to the ground. Hale also scored a probable and when he landed the crew chief painted two MiGs just below the cockpit. However they were soon removed because they were against policy.
Despite this, there is a photo of Hale with his MiG kill and the second probable painted on his Meteor. It may well be the only Australian aircraft ever to display any MiG kill markings. Fortunately for me Aussie Decals published a sheet with those marking on it many years since and I happened to have a copy. All I needed now was a decent Meteor F.8 kit to put them on.
I am not a great fan of the Meteor as a modelling subject but somehow I’d already made three Meteor models. There is the Dragon F.1 which I made because it is a historically important aircraft, a Meteor F.4 which was given to me by a friend who has since died, and a Meteor NF.14, the old Matchbox kit, because I must have gone funny in the head that month. I had the Xtrakit (MPM) Meteor F.8 which didn’t look promising but, around this time, the new Airfix Meteor F.8 was released. Thus, I could achieve three things with this kit. I could make a MiG killer, I could make a RAAF aircraft, and I could try out one of the new Airfix kits.
I won’t bore you with the details of building this kit. For the most part it lives up to the good reputation of modern day Airfix kits. Some people think they are still not among the top level of current kits but I think they are excellent and give modellers everything they need to make a very good model. By current standards they are also reasonably priced, so what’s not to like about them. The instructions are excellent and lead you though the building process in simple and clear stages. The parts fit is excellent … with two exceptions.
The model cockpit is very nice and you can lavish a lot of time making it nice, until you realize that it’s all painted black. Why bother? Especially since I make my models with the canopy closed. However, no matter how I tried I could not get the assembled cockpit to fit snugly into the fuselage halves and there was a gap about a millimeter wide in the forward fuselage no matter what I tried. I looked at some You Tubes of others making this kit and found that some didn’t have this problem, and others did but didn’t comment on it. I got so frustrated by this that I bought a second kit and made up the cockpit to see if it fitted – which it did. I can only assume that the coats of paint resulting from painting the cockpit had caused the problem.
If I’d been smart I’d have given up on my first attempt and made the second kit but, no, having gone funny in the head again, I pressed on with my first kit. This was not a smart idea even though filling the gap between the fuselage halves was not difficult. However, the slight misalignment meant that the nose undercarriage did not fit quite properly. Even worse, the nose cone didn’t fit either which made a mess of the cannons, which are a major feature of the nose. All in all, a tiny problem blew up into a major headache.
This problem might have been operator fault but the other headache isn’t and the reviews I’ve seen on the interweb have also commented on it too. This difficult to explain without pictures but the problem is with the main undercarriage which is cleverly arranged so you can paint the tires separately from the mudguards. However, the fit is so tight that you can either fill the resulting gap between the wheel and mudguard halves or, like me, spend a lot of time and effort making the parts fit and avoiding the gaps. The former is probably the smarter approach.
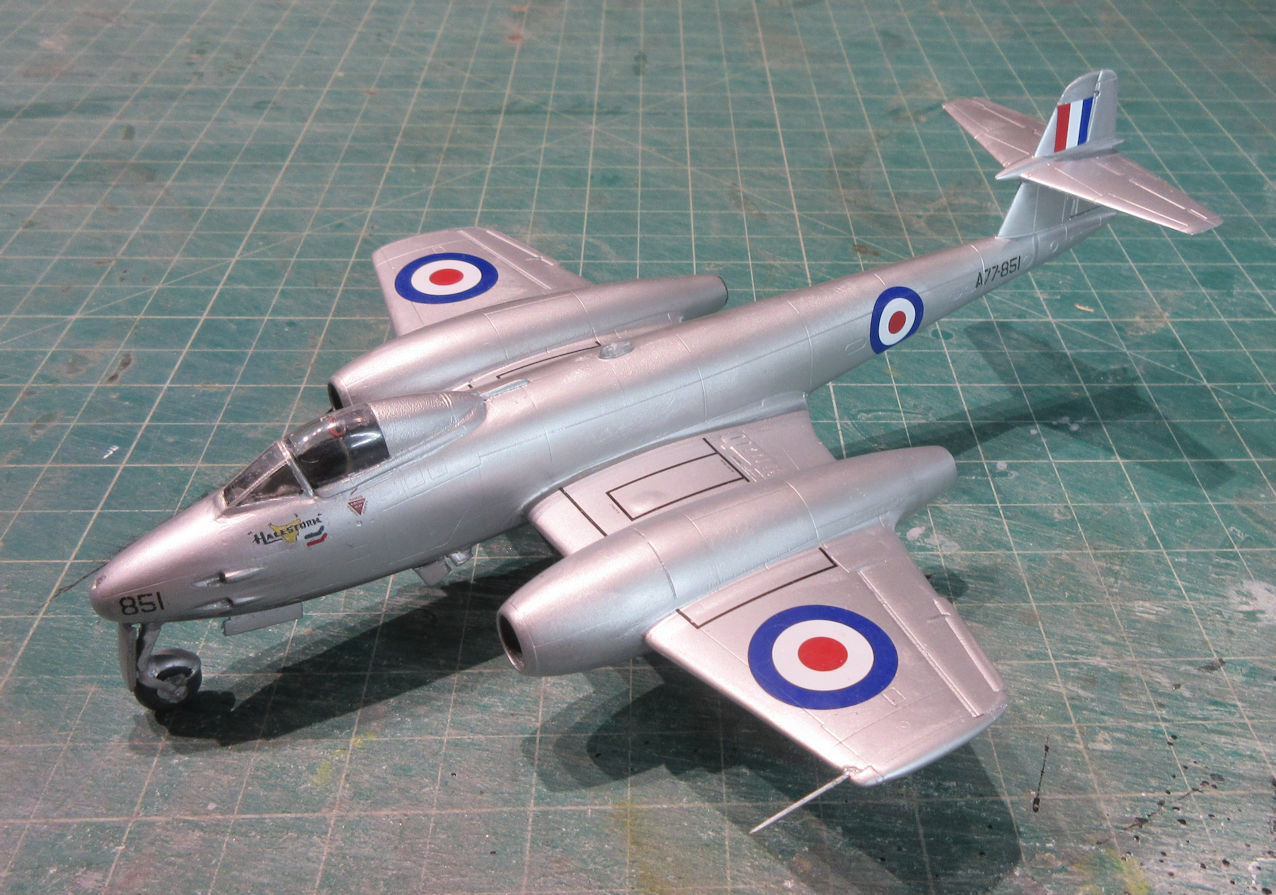
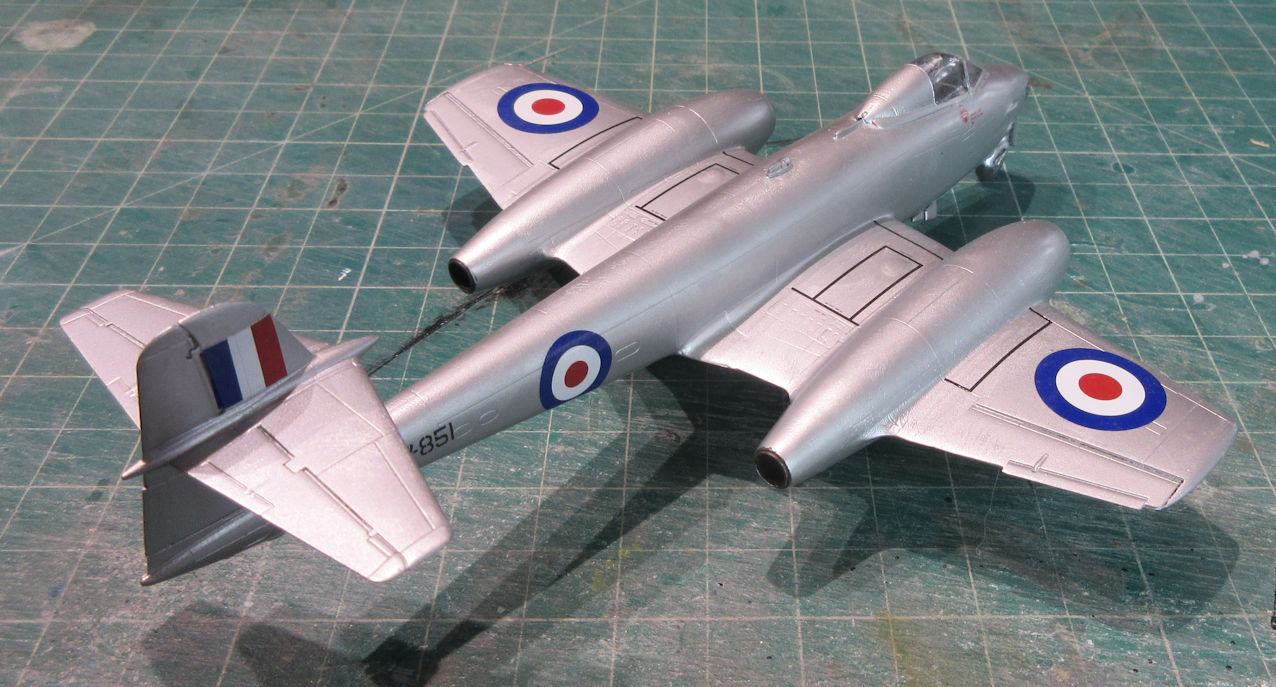
Apart from that, the only other challenge is which metallic paint to use on this model. The RAAF Meteor F.8s were all ex-RAF machines and appear to have been given the protective aluminum coating. Tamiya’s TS-30 ‘Silver Leaf’ was suggested to me so I tried it and thought it looked a bit ‘glittery’, so it was back to the old faithful Tamiya AS-12. The decalling threatened to be a trial by ordeal with a decal sheet heavily loaded with stenciling. Happily, the more photos of RAAF Meteors I looked at the more delighted I became that I could not see any stencils on them. Only the aftermarket registrations and nose art adorned this model, the rest came from the Airfix kit.
A minor but important detail is the navigation beacon prominent on the upper spines of RAAF Meteors. There’s nothing about it in the kit instructions about them so I worried a lot about this until I noticed that it is included in the transparent sprue for this kit. It’s probably there for a later version of this kit. So that problem is easily solved if you know where to look.
In summary, I’d recommend this kit if you can make it so the cockpit fits snugly and you know there are problems with the main undercarriage parts. I don’t know if there are any modern day decal sets for RAAF Meteors yet, but I’m sure there will be sooner or later.
PS A novel feature of this kit is moulding the pitot tube as part of the port wing tip. It looked flimsy and fragile to me, the kind of thing that would be blown off in a strong breeze. I thought I’d give it a go anyhow to see if I was right, and I was. While I was taking photos a tiny tap saw it drop off. So, if I were you, I’d find some better way of attaching a pitot tube than using the kit part.
Leigh Edmonds
April 2023
