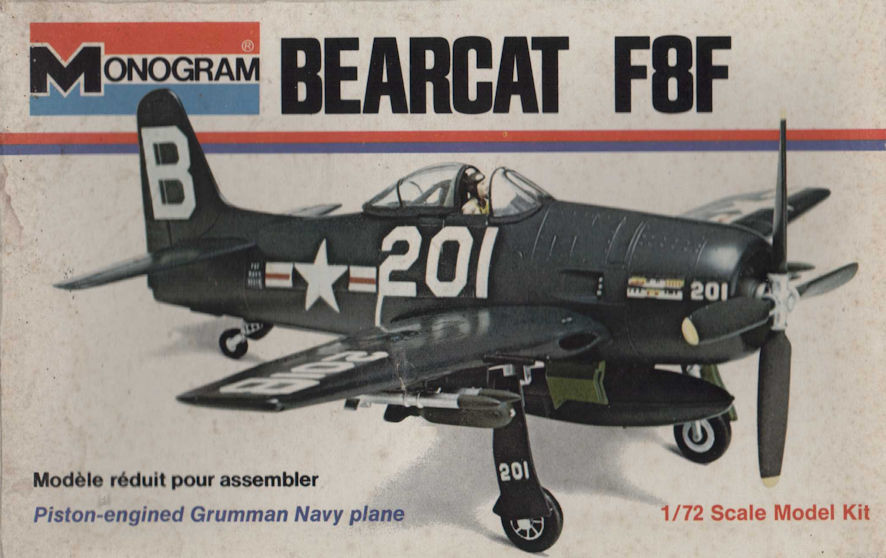
In years long past I built the Monogram 1/72 Grumman F7F and F8F kits and loved them. They are not complex kits but they go together very neatly and look the part. The Monogram F8F kit was first released in 1970 and has since been re-released by Hasegawa and Revell. Since then Frog, Sword and ART Model have published injection moulded kits of the F8F in 1/72 but they are hard to find on the second hand market if you don’t already have them in your collection. There is also a full resin kit that I know nothing about and High Planes offer some Bearcat racers that look very tempting. But let’s concentrate on the military F8F for the moment.
With the onset of my desire to make aeroplanes painted in the US Navy Dark Sea Blue scheme I looked at my kit collection and found that I had two kits of the F8F, the venerable Monogram kit that I must have picked up from ebay at some stage and the much more attractive looking ART Model kit. The ART Model kit looks beautiful in the box with some nice decals and some excellent looking resin parts, particularly the engine and wheel wells. So I started on that kit with the intention of keeping the Monogram kit as a kind of keepsake from the good old days of scale modelling.
Be warned, and I’m being serious here, if you have the ART Model kit of the F8F take it now and drop it straight in your rubbish bin. Don’t even open it to look inside because you might be seduced by all that lovely looking resin. If you do try to make it you will enter a world of real modelling pain and in the end you will reach the same conclusion that I, and several other kit reviewers have reached, that this kit is literally unmakable. The problem is with that beautifully moulded resin part from the undercarriage bays, it just won’t fit inside the wings. You can try thinning down the plastic in the wings so much that they are in danger of collapsing and you can thin the resin to within a nonometer of all that beautiful detail to make it fit, and it won’t. I lavished quite a few evenings on this kit and finally the only way I could resolve this problem was to throw it in the bin. So, take your ART Model F8F kit, go straight to your rubbish bin, drop it in and walk away without hesitation or regret. Trust me, I’m doing you a big favour by telling you this.

This left me with the Monogram kit which, Scalemates tells me, is the 1975 boxing of this kit. I made it when it was first released and then again more recently as a F8F-1 with South Vietnam air force markings, but it didn’t come out so well so it’s not one of my favourite models.

There are a lot of reviews of this Monogram kit and some of them point out the flaws with this kit, mainly little problems with accuracy. Apparently this kit is something of a mixture of -1s and -2s and one suggestion seemed to be that the tail is a little too short for a -2. What all the reviews seem to agree on is that this is a pretty decent kit for its age and probably still the best F8F kit around despite being fifty years old.
Most modellers seem to be quite happy to make it straight out of the box and I was too. There are suggestions that, at one time or another, there were some aftermarket parts for it to improve the cockpit and the wheel wells, but I couldn’t find any of them in any of the usual places on the internet. I did have a couple of after market decal sets for the F8F-2 with marking for US Navy and French Aeronavale aircraft, which was a blessing because the fifty year old decal sheet was looking a little decrepit.
I’d only just started work on this kit when I read that Hobby Boss is releasing 1/72 kits of the F8F, apparently in both the F8F-1 and F8F-2 versions. You may thank me personally for this – you know what they say about trying to make old kits of a subject because there are no new ones, and that as soon as you start work on the old kit some manufacturer will announce that subject among their new releases. I expect the Hobby Boss offerings will be good but I you never know, the ART Model kit looked good until I tried to make it.
Meanwhile, the old Monogram kit goes together simply and easily. Any complexity in this kit is built into the mouldings with, for example, the complex undercarriage of the F8F reproduced fairly well in one piece – some modern kit makers could have offered three or four pieces instead but since most of the complexity is in the wheel well where you can’t see it who’s to know. Of course, there is no detail at all in the wheel wells, which would be a real minus point for some modellers, but not for me. How much time do you spend peering into a model’s wheel wells anyhow?
I suspected that the bare cockpit would be somewhat more obvious but the F8F was a small fighter for its time so it’s cockpit opening was small too. I painted the interior of the fuselage US interior green but once the basic but acceptable pilot seat is installed there’s not much you can see except it anyhow, so any aftermarket detail set would have been superfluous. If I’d made the model with an open cockpit canopy the absence of any interior detail might have been more obvious, so closing it, as I did, is the smart move.
Being an older kit there was a fair bit of flash and I thought the wing trailing edges needed some thinning, both problems were taken care of with some sanding sticks. The kit has raised details which some modellers would replace with scribed lines – but one of the house rules here is ‘No Scribing’ (well, a little bit when absolutely necessary) so I just sanded the kit all over to reduce the prominence of the raised panel lines. The kit needed only a tiny amount of filler, and I blame myself for that rather then the kit. Then on with some Tamiya gray primer and it’s time for the paint job.
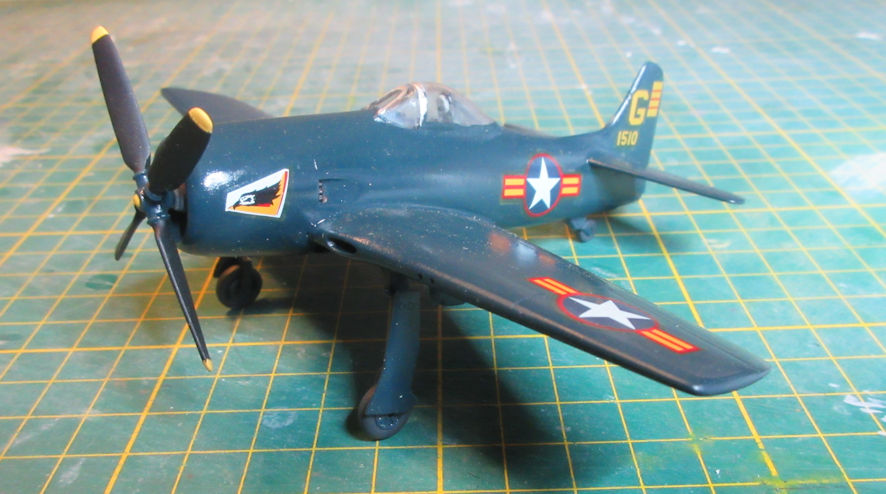
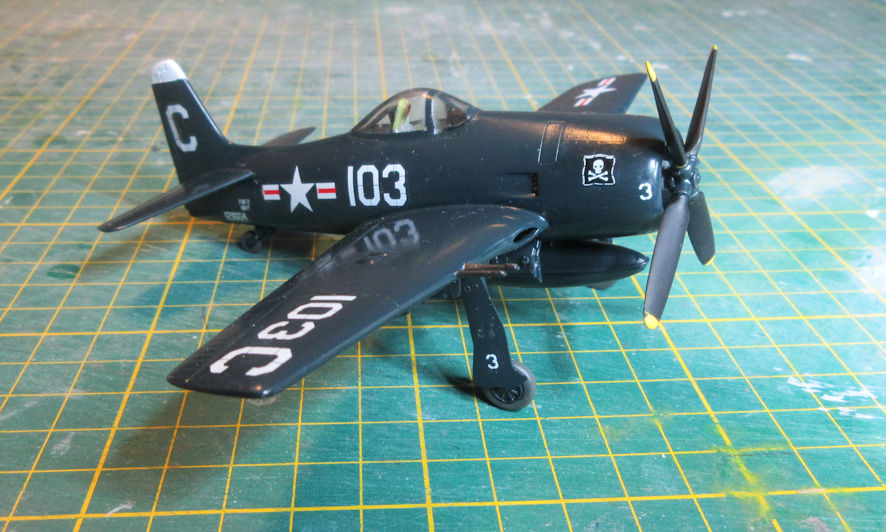
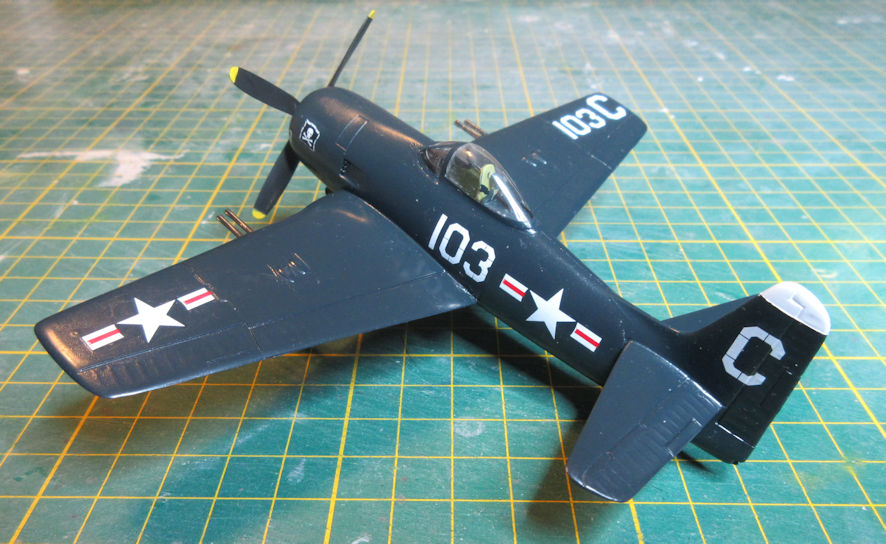
Painting models in US Navy Dark Sea Blue should be simplicity itself but, trust me, I made it difficult. My guess is that the primer was not thinned enough and landed on the model all pebbly, but I didn’t notice until I sprayed on the first coat of SMS lacquer Dark Sea Blue. The result was entirely unsatisfactory, not the lightly glossy sheen it should have been but with an uneven and spotty texture unbecoming of a nice and well maintained US Navy fighter of the period. The only solution was to sand the model back, using in turn the full range of Micromesh grits from 1500 to 12000. The end result is not perfect but it’s not too bad is you don’t look in the spots where my sanding was less vigorous for fear of destroying surface details. After all that work I wasn’t going to stuff up again so the paints were thinner and the end result is very nice.
On the matter of what colour to paint details such as the undercarriage, it seems that modellers have a range of ideas about what to do. Some prefer the traditional zinc chromate, some like bare metal or silver finishes. And then there were various combinations of the two. Almost nobody liked my option of Dark Sea Blue everywhere the painter of the original F8Fs could point a spraygun. I like this option because it is the easiest and because this was how the McDonnell FH I saw in the National Air and Space Museum in Washington was painted. The only parts that weren’t Dark Sea Blue were the tyres, the oleos and the markings. So perhaps there are four reasons why I like models that are Dark Sea Blue – they are good looking aeroplanes, it is a lovely shade of blue, I think it is most likely to be correct and, most importantly perhaps, there’s very little masking involved in painting these models.
Many years previously I’d acquired the SuperScale decal sheet 72-643 which has decals for four F8F-2; one US Marines, two US Navy and one Aeronavale. Ordinarily I would have used the Aeronavale decals because one of my other modelling interest is French aviation, and who could resist the combination of a US Navy aeroplane in French markings. However, since there is the promise of the nice new Hobby Boss F8F-2 to come I saved those decals for it and used some of the US Navy ones instead. Even so, I’m mighty pleased with the resulting model.


Leigh Edmonds
March 2021
