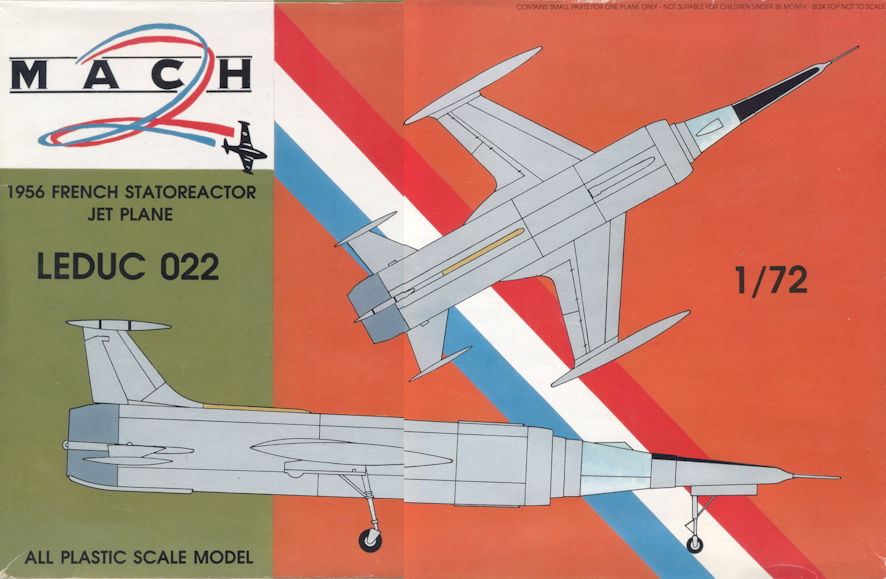
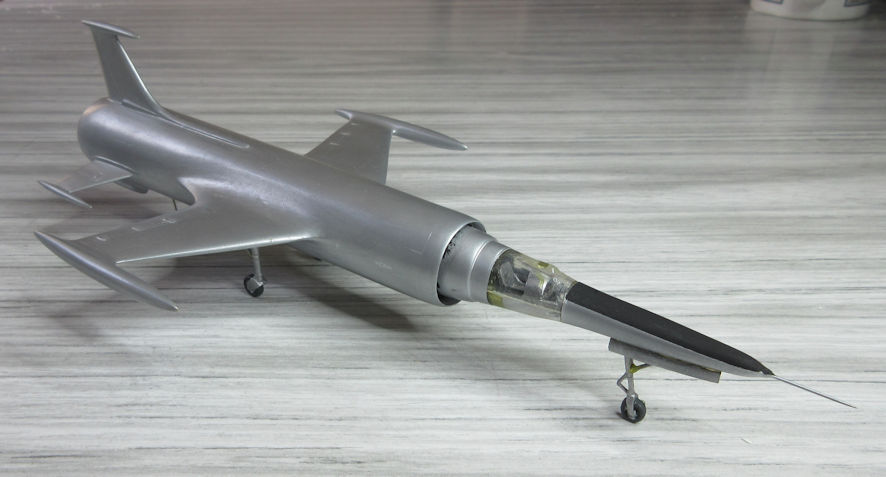
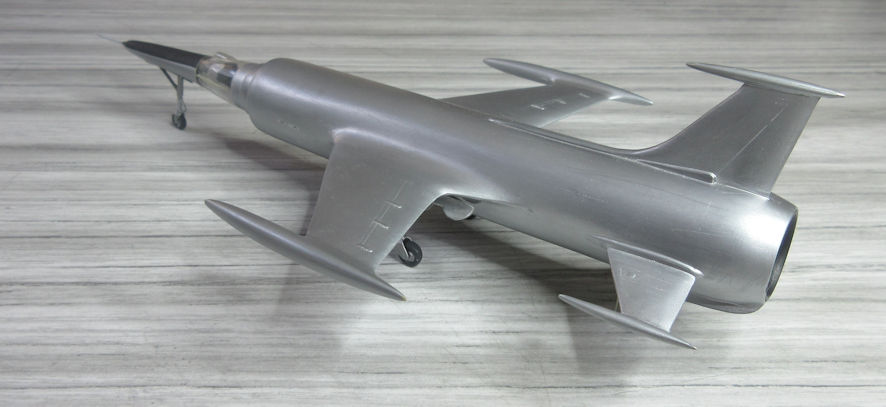
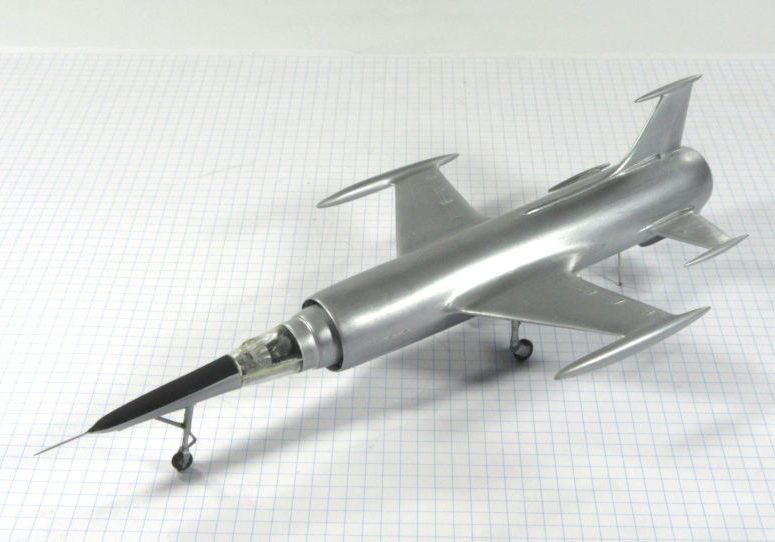
For a decade after World War II engineers and aeroplane designers struggled to work through the new technologies the war had thrown up and the defense challenges that new technologies (most importantly the atomic bomb) presented. Defense planners saw the need for an interceptor that could reach high altitudes very quickly to shoot down attacking bombers. Some of the resulting designs became familiar; the English Electric Lightning, the Lockheed F-104 and the Mirage III. There were, however, many more exotic designs that did not see production including the Republic F-108, the Avro Arrow and the French Leduc 0.22.
René Leduc began developing the ramjet in the mid 1930s. It had the same philosophy as the turbojet that Whittle and the Germans were developing around the same time but it was much simpler and required no moving parts. Unlike the turbojet, that compressed air with spinning blades before burning it, Leduc’s ramjet used a sophisticated intake design and some other kind of motive force to move the aeroplane through the air to compress it. Potentially this kind of engine could give very high power without the complexity and weight of a turbojet. The only major problem was getting the aeroplane up to sufficient speed for the ramjet to ignite, once ignition occurred the idea worked very nicely.
Leduc started work on his first ram jet powered aeroplane, the 0.10, in 1937 and completed it in 1945. It was the first ram jet aeroplane to fly and achieved speeds of over 800 km/h at 11 000 metres (36 080 ft) on half power. He developed the concept with the Leduc 0.11 and Leduc 0.21, both of which were launched from a ‘mothership’, flew successfully and demonstrated great potential.
The 0.21 was developed by the French Air Ministry which then ordered the 0.22 which was to be a mach 2 interceptor. Unlike earlier Leduc aeroplanes the 0.22 was also fitted with an Atar turbojet so it could take off and reach ramjet ignition speeds without assistance. The 0.22 had an initial loaded weight of 6 tonnes, 30 per cent of which was fuel. At mach 2 it would have a thrust in the order of 60,000kg.
The first of two 0.22 prototypes was completed on 5 June 1956 and flew for the first time on 26 December 1956. By March 1957 it had completed more than 30 test flights on the power of its Atar engine alone and was being prepared for the first test flights of its ramjet engine when the French Air Ministry withdrew funding in the 1957 cutback of military contracts. It was therefore never tested to its full potential.

I didn’t know this aeroplane existed until I happened across the kit tucked away in a corner in the Victorian Hobby Center. It looked like something out of a Dan Dare comic (those of you who are ancient like me will know what I’m talking about) and, being French and being so unusual, I couldn’t leave it on the shelf. So, having arranged a 2nd mortgage on the house to pay for the kit, I took it home. That’s when the trouble began.
I had two problems with this kit. The first was to find out something about the aeroplane it represents, the second was to make a reasonable model out of the kit. The research didn’t turn up very much; a little bit of information, three photographs of poor quality, a small line drawing and no dimensional data. (Perhaps there might be something on the internet but my computer decided not to be helpful when I tried to look.) Still, it was enough to go on with and sometimes too much information can be a burden because it lures you into the realms of AMS.
The kit seems to have been produced in about 1991 and must be a limited-run injection thing. The one I got had some trouble with plastic not getting into the every corner of the mould so some parts were not properly formed. The instruction sheet is multi-lingual in that it has an exploded diagram of dubious artistic merit and nothing by way of words to confuse the issue. Still, I’ve seen worse, and there’s not much choice if you want to make a Leduc 0.22.
Construction is actually straight forward because the aeroplane is fairly simple in layout, but I had to be careful at every step of construction to make sure that the parts fitted well. Nothing seemed to fit just right, every piece had to be carefully tested and trimmed to fit and all along I had to keep in mind what the next assembly step would be and make sure that the pieces I was gluing together at the moment would fit with later sub-assemblies.
I spent a lot of time peering at photographs of the 0.22 and found some major discrepancies between the kit and the photographs (perhaps the model represents the other prototype, but that seems unlikely). For example; on the kit the wings are mounted on little raised fairings while on the photographs the wings are faired directly to the fuselage; on the kit the tail farings stretch back to the end of the fuselage whereas in the photos they don’t; there are a couple of lumps and bumps on the forward fuselage in the kit that aren’t in the photographs and there are a couple of odd pieces in the kit that don’t seem to be on the aeroplane. Additionally, the rear fuselage fillets are too thick and I had to make up new ones from plasticard and the nose probe was badly formed so I replaced it with an old darning needle. None of these are serious problems but it took a while to get them all sorted out to my satisfaction.
After all the trouble I had getting the pieces to fit and in rectifying the mistakes in the kit I then spent a lot of time making sure the surface of the model was flawless (for me anyhow), because the only finish is bare metal with a tiny little flat black anti-dazzle panel. I was tempted to try using the sheet of ‘Bare-Metal’ I’d been saving up but I’d already had enough trouble getting the model to that stage so I didn’t feel inclined to tempt the modelling gods any further. Instead I went for the old tried-and-true Metalizer.
I’m not keen on the stuff you spray on and then buff up because it comes off too easily and you have to be very careful with the buffing. However, some time ago I discovered that if I went over non-buffing Metalizer with a bit of worn wet-and-dry paper very lightly it came up looking quite nice. There are no markings in the kit so that was more angst saved (I could see some markings on the tail in one of the photos but not clearly enough to be sure in putting them on the model, so I decided not to tempt fate).
The end result… I like it a lot. A great deal of effort went into getting the relatively simple kit to come up nicely and it’s something you won’t find in most model collections.


Leigh Edmonds
July 2001
