Win One! Lose One!
It’s been a month in which resin kits have spent a lot of time on my workbench, mostly by accident. Over the years I’ve collected quite a few of the now rare Dujin resin kits of interesting but obscure aeroplanes. I keep them in an archive box and occasionally pull one out at random to make. They are all interesting so, even though it’s a lucky dip as to what comes out, the kit is always interesting. This time is was the kit of the little Caudron 232 sports plane.
In another box I have an assortment of 1/144 resin kits I’ve picked up over the years and I’m attempting to empty by making them all. Lucking dipping into that box resulted in me pulling out the Welsh Models 1/144 kit of the Bombardier CRJ200 regional airliner with Delta Connection decals.
So, let’s take them to the bench and see how they go. Beginning with the loss.
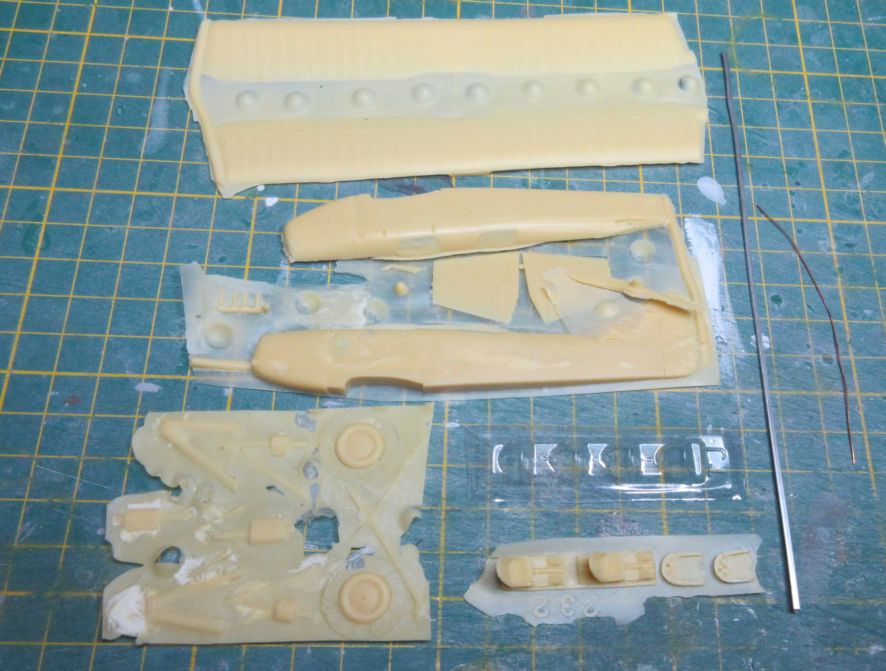
 Generally speaking Welsh Model kits are basic but offer a good shape that represents the original well. There is little super detailed about these kits and when you start on one you expect to spend some time making the parts fit well and in refining the details, if you are so inclined. For example, in this kit the resin engines are nicely formed in one piece but the rear of the fan exhausts are solid so they need excavation around the engine’s hot section to make them look realistic. This is not difficult to do and the resin is good to work with, if you go about the process patiently. When the engines are ready they fit nicely into slots on the fuselage sides which give a good positive location. But before you do that you have to make the wings and one part fuselage come together harmoniously.
The wings come in one piece of very nicely moulded resin with the flap tracks well replicated on the underside. There is gap in the wing centre section and in the bottom of the fuselage where, one suspects, the two parts are supposed to go together. But they don’t. Either the gap in the wing center section is not wide enough, or the fuselage is too wide. Actually it’s probably both. Filing away at the fuselage sides and the sides of the indentation in the wings gradually allows them to come together but at first the fit is so snug that the wings have a definite anhedral, which does not look very nice. A lot more work went into making the parts fit with the wings beginning to at least take on a slight dihedral.
The kit comes with a little piece of white metal that goes on the nose, presumably to give it enough weight so the model is not a tail sitter. I stuck that on with some epoxy glue and then the entire airframe and engines were ready for finishing. There are white metal winglets to go onto the wingtips but the fit between them is very random and you have to consult the drawings to get them at the right angle. I used small wire pins to hold them in place, I can’t imagine how else they would stay in place. At this point everything was looking fairly pleasing and positive.
After a considerable amount of filling and sanding, and more filling and sanding, the model was ready for paint. The kit instructions are not very helpful in this department so some research on the interweb became necessary to see that the model should look like. This turned out to be overall white with the exception of the leading edges of the wings and empennage which are polished metal. Again, nothing difficult to achieve if you are used to doing it. The main thing about obtaining a good white finish on an airliner is to have a scrupulously smooth surface and apply the white in thin even coats. I start with some Tamiya white primer, then some white automotive lacquer to give depth the white (you could use more Tamiya primer if you like but the automotive lacquer is cheaper) and then a couple of coats of Tamiya rattle can Pure White. By this time the model was looking alright, nothing special but still not a disaster.
The kit undercarriage is curious. It comprised tiny little legs and wheels in white metal which need a little tidying up. The question is, where to put them. The kit has no wheel bays for the main undercarriage, you stick the legs straight onto the lower wing surface into holes that you have to figure out and drill for yourself. On the other hand, there is a bay for the nose wheel but in real life that is hidden by main nose undercarriage doors which fold up to hide the bay when the aircraft is on the ground. So that has to be filled. As an aside, when I counted I found one of the tiny main wheels was missing, but no worries, that’s what the spares box is for.
With the undercarriage legs attached and the nose undercarriage bay filled and a couple more coats of white to cover up those challenges and it was time for the decals. With any luck they would turn an ordinary looking model, which had taken more time and effort than it should have, into something at least respectable.
The decal sheet was typical Welsh Models, good and respectable but nothing outstanding. It offered two options for the tail logos and my research on the interwebs found lots of good photos of the one with ASA on the tail. Unfortunately the tail decals were bigger than the tail and needed a lot of work to get them lined up properly. Unfortunately I made a mess of that and had to go to the second set of tail decals, for Conair, that went on very nicely, once I knew what I was doing.
Only later did I look closely at the rather rudimentary instruction sheet to see that the aircraft with the Conair tail markings also has a different colour scheme, not all over white like the ASA decals. Diligent searching of the interweb finally found me a couple of photos of a Conair CRJ200 which appears to have a light grey underbelly, though I am not sure whether this extends to the wings.
If I was a real modeller I would now repaint this model to make it a true replica of a Conair CRJ200. However, I can’t work up any enthusiasm to do that. This is a rather pedestrian model that wouldn’t be worth the additional time invested in it. To make matters worse, after I had finally found the information I needed I wondered if I night have a spare decal sheet with ASA tail logos to rectify the problem. (I have lots of aftermarket decal sheets.) Instead, I found, to my shocked surprise, that I have another kit of the CRJ 200 in my collection. This one a rather tasty looking BPK kit, injection moulded with all the detail lacking from the Welsh Models kit. I’ll probably make that kit one of these days but in the meantime this model will have to suffice because I don’t feel like making another CRJ200 after the experience with this one. It will also remind me of the lesson learned from it. Do your research before you start, not after.

Which brings us to the Dujin 1/72 Caudron 232. This is an aircraft I knew absolutely nothing about except that, if it was good enough for Jean Pierre Dujin to make a kit of it, it was good enough for me to want to make a model from that kit. The kit comes with a fairly rudimentary instruction sheet, in French, which gives no instructions about how to assemble the kit parts but does have good drawings of what the finished model should look like. Not all Dujin kits have decal sheets but this one did, plain black markings for two aircraft.
There’s not much information about Caudron 232s on the interweb but I did find enough to make this project even more tantalizing. It was a popular sports aircraft in France with fifty made in the period around 1930. It is kind of a French equivalent of the deHavilland DH-60 Moth that was popular in British light flying around the same time. (It will be interesting to make a model of a DH-60 to put alongside this model.) I also found a few pictures of the 232, most of them not of very good quality, but enough to supplement the plans so that a reasonable replica can be made.
The first part of the project involves liberating the resin parts from the little puddle of resin in which they were formed. When I’ve been traveling I usually take a few Dujin kits with me and spent the long lonely evenings doing this, but had not yet done so to this kit. If anything, it is therapeutic work, much like sanding down vacform kits, and seeing the kit parts emerging from their surroundings.
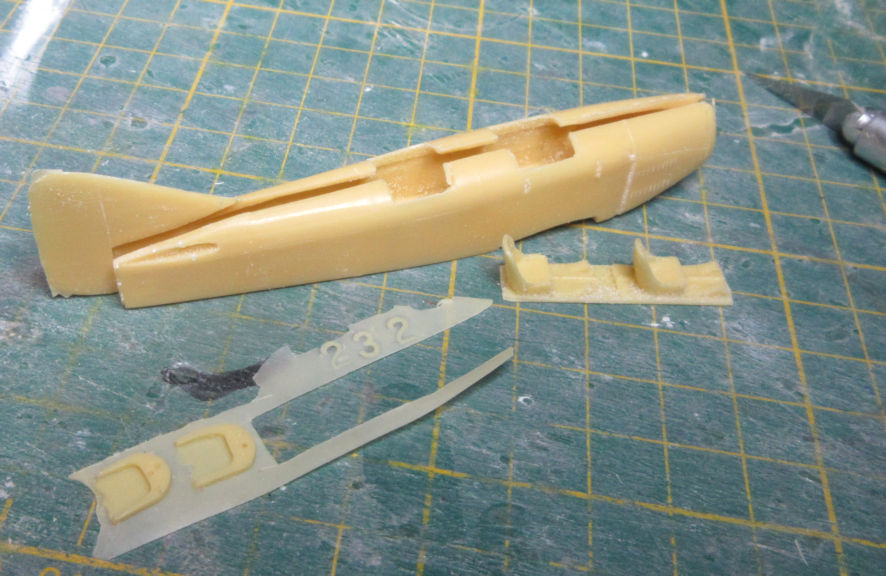
The results were a little puzzling because there appeared to be more than one set of undercarriage legs, so I can only assume that Dujin also made a kit of a slightly different version of the 232 and they go with that version. In any event, assembly was simple but hardly straight forward because there was no indication of where parts such as the tail fins attached to the fuselage, that’s what the drawings were for. Since there were no locating pins I used craft wire and tiny holes to make them and give the joints strength. Again, this can be rather therapeutic work if you approach it in the right spirit.
The real problem with these Dujin kits is that if you make a mess of one the likelihood of finding another to replace it is close to zero. So, if I’d made a mess of this kit I would not have another 232 kit with which to try again. Consequently, I made this model in slow and simple stages, waiting several weeks between stages so I could build up the courage to attack the next stage.
Being an open cockpit aircraft but having no idea of what the inside of a 232 looked like, I dressed them up as best I could using kit parts, a bit a sprue and plasticard. I used seat belts borrowed from a French World War I aftermarket etch set, having no idea of what French seat belts in a sports aircraft in 1930 looked like and finding no reference on the interweb.
The third most hair raising part of this project was attaching the top wing to the bottom wing using the length of metal streamlined cross-section aluminium the kit provided. The indications of where the struts should attach to the wings was vague but with a certain logic so I drilled shallow indentations in the spots that seemed the most likely. Using the plans I cut the struts to the right length plus about a millimeter or so and filed down the ends so they would fit into the indentations. Then followed a couple of hours of harsh language and frayed nerves before the upper wing was firmly attached to the lower wing. In the process super glue had gone everywhere so the following night or two was spent in cleaning up that mess.
The second most nerve wracking part of the project was in attaching the undercarriage. Unlike the interwing struts, which were metal and thus fairly strong, the undercarriage kit parts – once I’d worked out which parts to use – were fragile resin and therefore required much less harsh treatment. After much trouble in trying to ensure that the wings remained level after the undercarriage legs were attached I finally gave up, cut the main supports for the legs to the same length and prayed that things would work out okay as the glue set. Fortunately for me, and for the model, it did.
The most terrifying part of the project came right at the end when almost everything else was done and it was time to place the windshields in front of the cockpits. The fact that the front cockpit was hiding under the top wing added an unwanted degree of difficulty. Most people are allergic to cockpit canopies crash moulded in celuloid, and rightly so. Fortunately the kit provided four of them and I’ve released my share of cockpit canopies from celuloid before so I was not put off. Peering at the photos of real Caudron 232s it was clear that they had two kinds of windscreens, neither of which was replicated in the celuloid provided by Dujin, but the prospect of making new winsdcreens was even more daunting than using the kit ones, so I persevered with them.
After I’d liberated the first little windscreen I found that it was so small and so transparent that I couldn’t see it and the carpet monster probably snacked on it. After a while I decided that the way to make the windscreens visible was by hand painting the framing on them before cutting them out and, strangely, that worked. (Next time I will use strips of pre-painted decal instead to make the framing neater.)
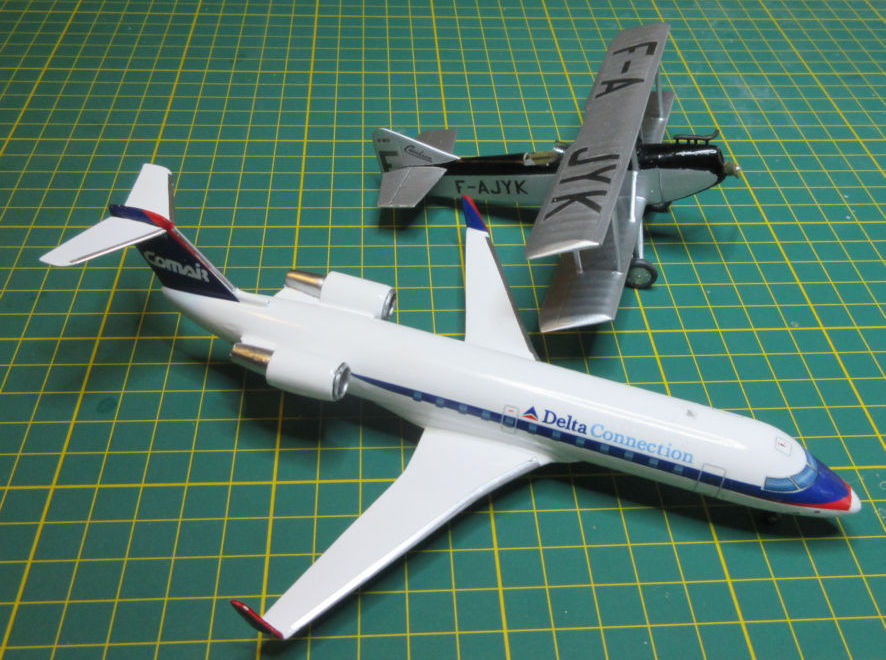
So, here are two recently completed models sitting on my work bench. The 1/144 Conair CRJ200 is not a model which I will remember fondly, if at all. On the other hand, I’m sure that my little Dujin 232 will remain a prized and fondly remembered models for many years to come.
Leigh Edmonds
February 2022

