CRICKET NIGHTS
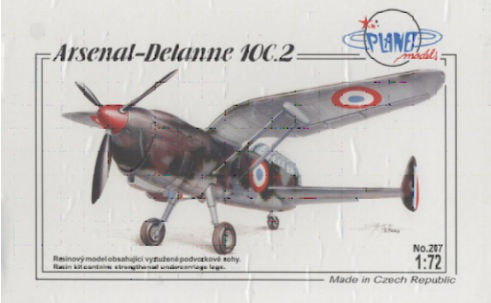
On the first night of the first test against South Africa I finally took my courage in my hands as started work on the Planet 1/72 resin kit of the Arsenal Delanne 10. I’d opened the box and gazed at the contents on several occasions but the scope of the problems to be overcome were too much to encourage me to start work.
Since, however, the cricket wasn’t on my television I had to listen to it. While I was doing that I had to have something to do with my hands and this seemed like a good time to finally dust off and start turning the box of challenging bits of resin into a model. So I spent the first night doing the cockpit, gluing the fuselage halves together and then cutting out the vacform canopy and fixing it to the fuselage.
After that there was the business of masking off the canopy. All of this took the best part of three sessions on the first day. Towards the end of the final session I painted a coat of French dark blue-grey over the canopy that will appear as the interior colour on the canopy framing and also protects the masking while the rest of the model is made. Then it was time to head off to snoozyby land.
The next evening we watched an interesting movie that dramatized the lives of gypsies in France during the German occupation. (Those Germans weren’t nice people.) By the time that finished it was lunch at the cricket, so I sat and looked at what had been achieved and what remained to be achieved. The cockpit canopy had been fiddly work and the masking had been tedious, but the next stage of fixing the wings and tail looked even more challenging because things were not as perfect as one might expect in such an expensive kit. When you make a Dujin kit you expect problems with getting all the bits and pieces square, but not with a Planet kit. But looks can be deceiving and if there is a millimeter or two out here and there a kit can end up looking very weird, if you don’t proceed carefully.
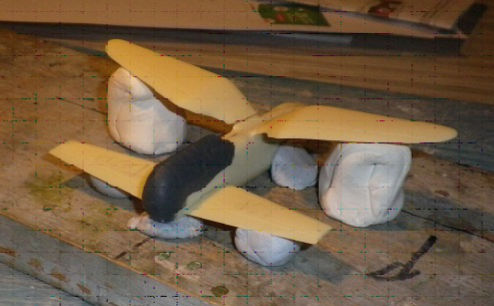
To overcome this problem it was time to get out one of my oldest and most trusted modelling aids, a piece of wood with a cross on it. That, together with some blu-tac and a ruler, makes it possible to make a model made from a kit like this as good as possible.
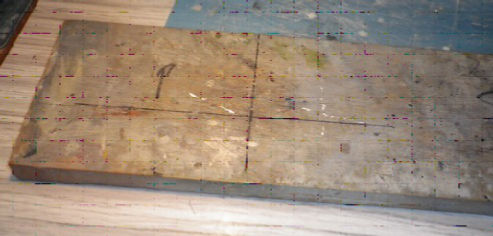
The point of this bit of wood is that the cross on it is as square as I could make it, 90̊ on each angle, no more and no less, more or less. The theory is that if I line up the fuselage on one of the lines as accurately as possible then the other line will make sure that the wings, etc, etc, will go on square. Let me demonstrate.
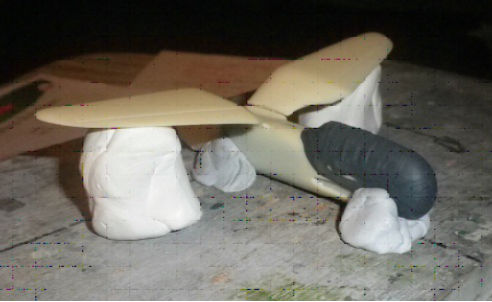
Here you can see the fuselage of this model which has been stuck to the board with globs of blu-tac along one of the lines using the join of the fuselage halves as the guide.
In the kit the wings are butt joined to the fuselage but this issue is sorted out be drilling holes in the ends of the wings, sticking in some craft wire with super glue and then drilling holes in the fuselage to match up with the wires in the wings. I make the holes in the wings a bit larger than the diameter of the wire so allow a bit of wriggle room.
Having got to this stage we now come to the most difficult part of the entire process. Using large blobs of blu-tac and a ruler I make sure that the wing tips are both at the right height, jiggling with the blu- tac to get everything right. Then I lined up the wings to be square using the cross line as a guide. A little bit more wiggling and both the wings look good from the front and rear and we are ready to glue everything together.
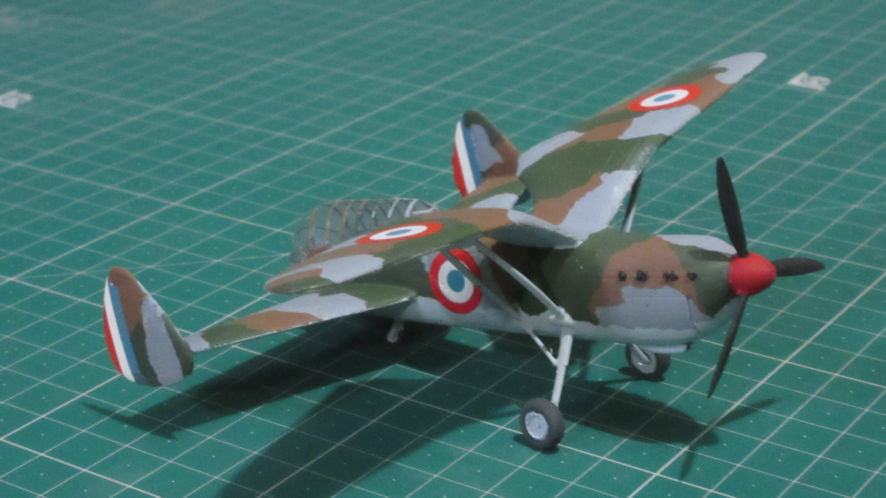
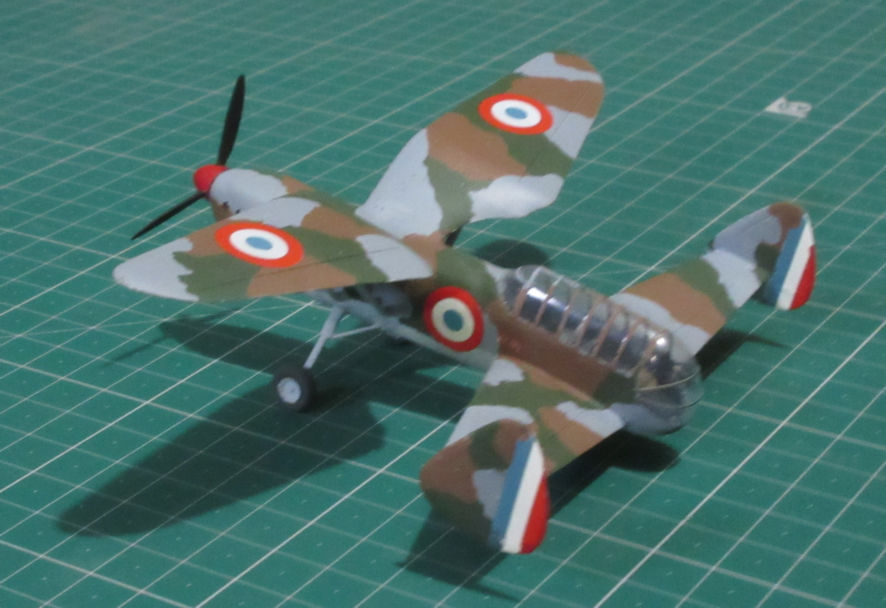
At the last moment it occurred to me that I was making this model as though it was a PZL P.11 which was flat across the wing tops and I should maybe check to see if this was right for this model. The trouble is that the instructions did not include a front view of the model so I had to hunt up a good three view drawing of the aeroplane on the interweb and the best one I finally came across turned out to be the same one as I’d had in a book I’ve owned since the 1960s.
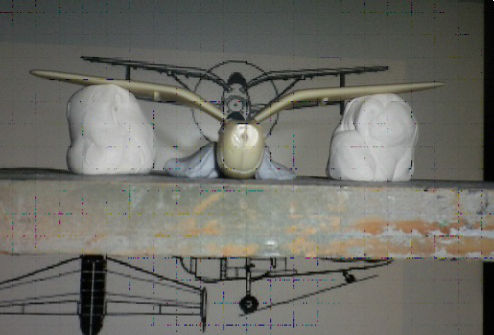
It’s just as well that I did because it turns out that the wings have a definite dihedral. Back to the fiddling with the blu-tac and measuring with the ruler and holding up the model next to the computer screen to see if the kit and the drawing were the same. In an attempt to do this I had trouble trying to get both wings at the same angle as the drawing and then finding out that one wing was a millimeter and a half higher than the other. Eventually I came to the conclusion that the problem was in the drawing and not in my ruler. More jiggling because the drawing shows that the leading edge of the wings is in a straight line while the kit wings really want a few degrees of sweep back. It turned out that it was impossible because the wings in the kit are not quite the same shape as the wings on the drawing. Eventually I decided on a compromise between what the kit wanted to do and the drawings said because, after all, how did I know if the drawings were accurate.
All this took a lot of time and it was just before tea at the cricket before I decided that I could fiddle away forever and probably not get everything looking better. So I slopped on the super glue, the thick stuff because there were some alarming gaps between that the kit wanted me to do and what actually looked reasonable.
Having got this far, and having a session of cricket to go, I resolved to push on and attach the rear wings. Unlike the butt joints for the front wings the rear wings slip into slots in the rear fuselage so the only challenge was in making sure that both ended up with the same amount of dihedral. This was a simple matter of more blu-tac and jiggling around until both tips were at the same height.

The tail planes butt join onto the rear wings but I had thought ahead – as I sometimes do – and done the craft wire, holes and super glue thing ready to attach them before gluing on those back wings. More blu-tac, more peering at the drawings and more jiggling until everything looks alright and it’s time to slosh on the very thin super glue to seep into the gaps. Finally, and breathing a great sigh and relaxing, I squirted everything with accelerator, just to make sure it was all set.
The most nerve wracking part of the entire exercise was in separating the model from the blu-tac without any of the joints cracking under the strain. This is the only really useful use I’ve found for those dental probes that all modellers buy. Then, it was time to pull up stumps for the night.
Leigh Edmonds
April 2014